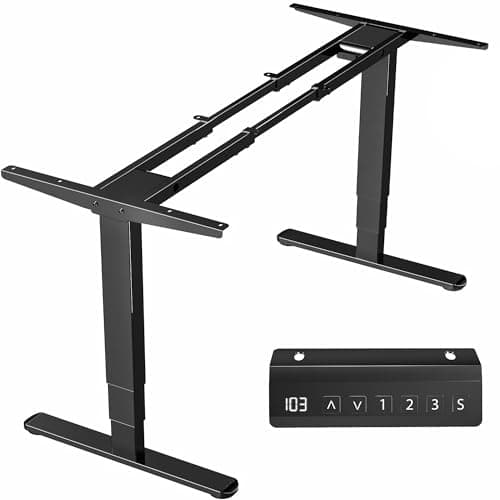
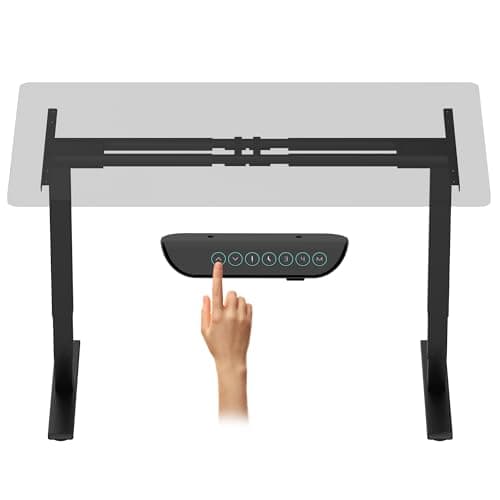
For most builds, start with the FLEXISPOT E6 Max frame— dual motor, three-stage columns, a 24.4 to 50 in range and a 330 lb capacity, which is the most headroom of the three frames here on both height and load. Then buy a top at least about an inch thick, check that your frame’s adjustable width actually spans it, and drill the grommet holes before you bolt anything together. That order is most of what separates a solid DIY desk from a wobbly one.
Frame-only is the enthusiast’s route to a sit-stand desk for three reasons. You can have a top that is wider, deeper or better-looking than anything sold as a complete desk; you can reuse a top you already like; and the frame is the part that matters mechanically, so spending the budget there is the right allocation. The trade is that you are now responsible for the three decisions a desk manufacturer would have made for you.
Decision 1: the top, and how thick it has to be
A tabletop on a two-leg frame is a beam supported near its ends, and the failure mode is bow in the middle rather than collapse. Thickness fights that far more effectively than material does: roughly an inch (about 25 mm) is the sensible floor for a top up to about 60 in wide, and more is better if you are going wider or planning to clamp a monitor arm to the back edge.
Three common choices behave differently. Solid wood and butcher block are stiff and heavy, and heavy is useful — it is dead weight on the frame rather than bounce. Laminate over particle board is the cheapest and is perfectly serviceable at thickness, but it sags soonest when it is thin and it holds screws least well. A door blank or a reclaimed slab works and is where a lot of the best-looking DIY desks come from, provided you check it is flat before you drill it.
Size the top with the arithmetic from our desk depth guide: a 24 in deep top is tight once a monitor stand is on it, and 28 to 30 in is the depth that lets you put a screen at arm’s length. If you want a second screen, check what size monitors a dual setup needs before you settle on width.
Decision 2: does the frame actually fit the top?
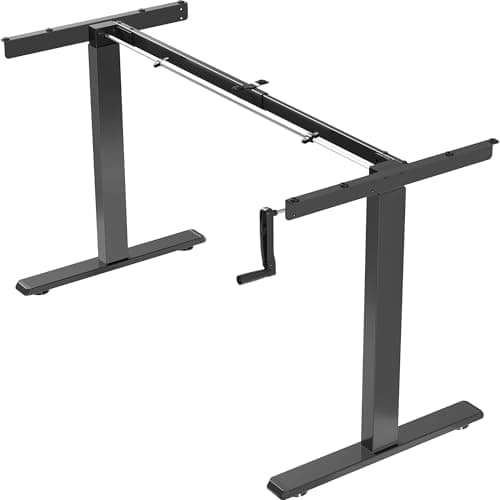
This is the step people skip, and it is the one that produces a return. A frame has an adjustable width range and a stated supported tabletop size, and both have to contain your top. The VIVO manual frame below publishes it plainly: a 34 to 52.3 in adjustable frame width, supporting tabletops 34 to 72 in long and 23 to 43 in deep. A 76 in slab is outside that, however much the frame appears to stretch.
Two other clearances to check before you buy. The columns need to sit inboard of the top’s edges — usually a couple of inches — so a top exactly as long as the maximum frame width leaves nothing to inset. And the crossbar sits low between the legs, which is where a tower or a footrest wants to be.
Decision 3: the load arithmetic
Add up what will actually sit on the desk, including the top itself. A solid wood top can easily be 60 to 80 lb; two 27 in monitors with an arm add perhaps 30 lb; a desktop tower is another 25 to 40 lb unless it is going on an under-desk mount, in which case it still loads the frame.
Then read the ratings honestly. The VIVO manual crank frame is rated to 132 lb, which a heavy solid-wood top plus a dual monitor arm can consume on its own. The VIVO electric frame is rated to 220 lb, and the FLEXISPOT E6 Max to 330 lb. Choose the frame so you are working well inside its limit, not at it — a frame near capacity moves more and raises more slowly.
The build, in order
1. Check the top is flat. Lay a straight edge across it in both directions. A top that already bows will not be straightened by a frame.
2. Cut the grommet holes now. Deciding cable routes after the desk is assembled means working upside down under a loaded desktop. Mark where the monitor cables and the power feed will drop through, then cut. A grommet hole is not reversible, so measure against where the monitor arm clamp and the chair will go.
3. Dry-fit the frame on the upturned top. Set the frame width to the top, centre it, and inset the columns from each end. Mark every screw hole with the frame in exactly the position you intend.
4. Pilot-drill, and watch the screw length.Pre-drill every hole slightly undersize. Then check your screw length against the top’s thickness — a screw longer than the top is thick will come through the surface, and that is the single most common DIY desk mistake. In particle board, pilot holes are not optional; the board splits without them.
5. Tighten in a cross pattern. Snug every bolt first, then tighten opposite corners in turn, the way you would a wheel. A frame bolted up crooked never stops moving.
6. Stand it up and level the feet. Nearly every frame has threaded leveling feet and on most floors at least one of them is not touching. Press each corner in turn and wind the short foot down until it takes weight.
7. Set your heights and retorque in a month. Use the desk height guide to set the sitting and standing presets from a measurement rather than by feel, then put a reminder in the calendar to retighten every bolt after a few weeks of use.
Then do the cables, while the desk is still empty
A sit-stand desk drags its own cables up and down several times a day, which is why cable management on one is a different job from a fixed desk. Our standing desk cable management guide has the service-loop method, and an under-desk tray plus a strip mounted to the frame is the standard arrangement. Do it before the monitors go on.
If it still wobbles
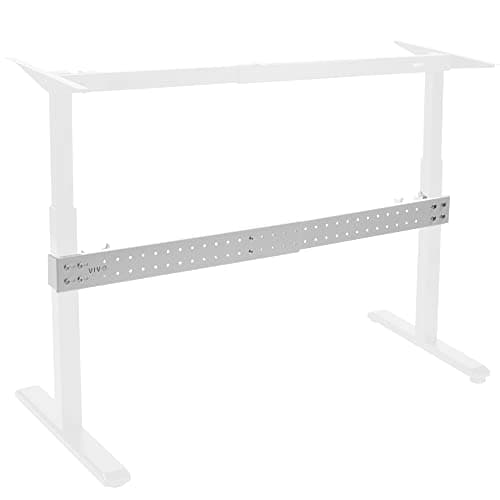
Work through the causes in order rather than buying parts: our standing desk wobble guide covers feet, bolts, crossbar, height and load, in that sequence. If your frame has no factory crossbar, the clamp-on stabilizer bar below is the highest-value single fix. If the top is what flexes when you press between the legs, no bar will help — that is a thickness problem, and you are back to decision one.
When not to build
If you want a 48 in desk at the lowest price, a complete budget desk usually beats a DIY build once you have paid for a decent top; see the budget standing desk roundup. Frame-only pays off at larger sizes, with nicer materials, or when you already own a top worth keeping. The standing desk frame roundup ranks the frames themselves on the three specs that predict stability.
The three frames, by the numbers that matter
| Frame | Height range | Capacity | Lift |
|---|
| FLEXISPOT E6 Max | 24.4-50 in | 330 lb | Dual motor, 3-stage |
| VIVO electric dual motor | 23.5-49.3 in | 220 lb | Dual motor, 3-stage, 38 mm/s |
| VIVO manual crank | 27.8-46.5 in | 132 lb | Hand crank |
FLEXISPOT does not publish a supported tabletop size range for the E6 Max frame the way VIVO does for its manual frame, so measure the frame width against your top before ordering rather than assuming. We are not going to supply a number the manufacturer does not.
A worked example of the load arithmetic
A 60 by 30 in solid-wood top at about an inch and a half thick is in the region of 70 to 85 lb on its own. Add a dual monitor arm at roughly 15 lb, two 27 in monitors at about 12 lb each, a dock, a light bar, a keyboard and a couple of books, and you are somewhere near 130 to 150 lb before anything unusual happens.
That total is already at or past the manual frame’s 132 lb rating, sits comfortably inside the VIVO electric frame’s 220 lb, and is nowhere near the E6 Max’s 330 lb. Weigh or look up your top before you choose, because the top is usually the heaviest single item and the one people forget to count.
Four mistakes that produce a bad DIY desk
A top that is too thin. Three quarters of an inch of particle board over a 60 in span will bow, and nothing bolted underneath fixes it.
Screws longer than the top is thick. They come through the surface. Measure, then choose the screw, then drill.
No pilot holes. Particle board splits and solid wood resists. Pre-drilling every hole takes ten minutes and is not optional.
Cutting grommet holes last. It is a miserable job over a finished desk and the position is usually a compromise by then. Mark and cut while the top is upside down on the floor.
What to put on it
A frame-built desk is a good candidate for a monitor arm, because you chose the top and know how thick it is — the monitor arm installation guide covers clamp against grommet and the thickness limits, and the monitor arm roundup ranks the arms. For the standing half of the day, a mat and correct standing ergonomics matter more than anything else you can bolt on.