SECTION 07 · Setup Guides
How to Manage Cables Under a Desk
The gear on top of the desk gets all the attention; the reason your setup still looks unfinished is the five feet of cable hanging off the back of every device.
We earn a commission when you buy through our Amazon links, at no extra cost to you. It never affects our rankings, and we say so when the cheaper product is the better buy. How this works.
Under-desk cable management is the step that separates a pile of good gear from a setup that looks and works like one deliberate thing. The principle is simple: get every cable off the floor, gather it into one managed path under the desk, and leave yourself a way to change a single cable later without dismantling the whole bundle. Do it once, properly, and you will not have to think about it again — and if you run a standing desk, doing it properly is not optional, because cables that have to travel up and down will snag or pull tight if they are not planned.
Here is the whole job, in order:
- Mount a cable tray or raceway under the desk to hold the bulk of the cables and any power strip off the floor.
- Consolidate power to a single feed— put one surge-protected power strip on the tray and run just that one cord to the wall.
- Route each device’s cable to the tray and plug its adapter into the strip, so no power brick dangles in mid-air.
- Bundle the runs with reusable hook-and-loop straps, grouping cables that go to the same place and leaving the strap loose enough to add or remove one later.
- Leave deliberate slackfor anything that moves — a standing desk column, a monitor arm — so nothing goes taut at the top of its travel.
- Label both ends of every cable so you can trace and unplug one thing months from now without guessing.
The rest of this guide takes those steps one at a time. You can buy the hardware as you go — the best under-desk cable management covers the trays, raceways, and straps worth owning.
Consolidate to one power feed
The single biggest source of under-desk chaos is having several devices each running their own cord to a different outlet. Fix that first. Put one good surge-protected power strip on your tray and plug everything on the desk into it, so only one cable leaves the desk area for the wall. This does three things at once: it collapses a dozen floor runs into one, it puts all your power bricks in a single managed spot instead of hanging off the edge, and it gives you one switch or one plug to cut power to the whole setup. A dock helps here too — by pulling your peripherals and displays through one hub, a good USB-C dock removes several cables before you manage a single one, which is why the best USB-C docks for dual monitors are as much a cable-management tool as a connectivity one.
A couple of safety habits go with that single feed. Use a genuine surge protector rather than a plain power strip for anything with a circuit board in it — a computer, a monitor, a dock — because a surge protector is what actually clamps a voltage spike, while a basic strip just splits the outlet. Do not daisy-chain one strip into another to gain outlets; that is a common overload and a fire risk. If you need more sockets, run a second feed from a separate wall outlet instead of piggy-backing. And add up the wattage of what you plug in so you stay well under the strip’s rating, especially once a space heater or a monitor with a hungry power supply joins the desk.
The tray or raceway is the backbone
Everything else hangs off the tray. An under-desk cable tray — a basket or trough that screws or clamps to the underside of the desk — holds the power strip and the mass of slack cabling in a channel you never see from a normal sitting position. A raceway does a similar job for the vertical run down a desk leg or wall, hiding the cables that have to reach the floor. Between them they get essentially every cable off the carpet, which is the change that makes the floor look finished and makes vacuuming possible again. Mount the tray toward the back of the desk so the cables have the shortest, least-visible path from each device down into it.
Trays attach in two ways, and the right one depends on your desk. Screw-mounted trays are the most secure and are the obvious choice for a wood or thick composite top you do not mind drilling; clamp-on or adhesive trays avoid holes and suit a desk you rent or plan to move, though adhesive needs a clean, smooth underside to hold long term. On a height-adjustable desk, favor a tray that attaches firmly to the moving top so the whole managed bundle rises and falls as one unit, rather than one anchored to something that stays put while the desk travels.
Bundle with hook-and-loop, not zip ties
Once the cables are in the tray, gather them into tidy bundles — but use reusable hook-and-loop straps rather than plastic zip ties. Zip ties look permanent because they are: the day you want to swap one monitor cable, you have to cut every tie and start over, and overtightened ties can pinch a cable. Hook-and-loop straps cinch just as neatly, open in a second, and let you pull one cable out of a bundle without disturbing the rest. Group by destination — the cables heading to the monitor together, the ones heading to the tower together — so a bundle is easy to follow, and leave each strap a little loose rather than crushing the cables flat.
None of this is a desk convention originally — it comes from rack wiring, where the same job is done at a scale that punishes shortcuts. The photo-documented before-and-after write-up at Steve’s Outpost shows what hook-and-loop bundling, consistent service loops and labeling by position look like on a full network rack, and every one of those habits scales straight down to the back of a desk.
For the cables you cannot tuck inside a tray — the visible run down a desk leg, or the bundle that crosses to a nearby wall — a fabric cable sleeve or a spiral wrap gathers several cords into one clean tube that reads as a single line instead of a tangle. It is the finishing touch that makes the front of the desk look intentional. Keep the sleeve loose enough to slide a new cable in later, and stop it short of anything that moves so it does not bind against a lifting column.
Standing desks need slack that moves
A sit-stand desk adds a requirement a fixed desk never has: the cables have to survive the full range of travel. When the desk rises, every cable running from the desktop down to the wall gets longer — and if you managed it tight while the desk was low, it will pull taut, strain the connectors, or yank a plug at the top of the lift. Plan for the desk’s highest position, not its resting one. Leave a deliberate loop of slack in each run, route the cables so that loop can open and close freely rather than catching on the frame, and use a flexible cable spine or chain if your desk did not come with one, so the moving cables travel as a single guided bundle. If you are still choosing the desk itself, the best standing desks notes which frames include cable management and which leave it to you.
The bundle also gets much smaller if the computer stops living on the floor. A tower down there forces every display, USB and audio cable to span the moving gap; hang the machine under the desktop on an under-desk PC mount and only power and ethernet still make the trip. Check your desk’s published lift capacity first, since anything mounted underneath counts against it.
Before you call a standing-desk run finished, test it. Raise the desk to its full height and watch every cable as it goes — nothing should pull tight, catch on the frame, or lift the power strip off its tray. Then lower it fully and make sure the extra slack folds away cleanly instead of piling on the floor or getting pinched under the mechanism. It is far easier to fix a snag now, with everything still accessible, than after you have sleeved and labeled the whole bundle.
Label everything before you forget
The last step is the one everyone skips and later regrets: label both ends of every cable. Once a dozen identical black cables disappear into a tray, telling the monitor cable from the dock cable from the charger is a guessing game, and you end up unplugging the wrong thing to trace the right one. A simple wrap-around label, a bit of tape with a name, or a clip-on tag on each end turns future changes into a ten-second job. Do it as you build the bundle, not after — it is nearly free while the cables are loose and a real chore once they are strapped down. And if part of your clutter is running two computers into one keyboard and screen, a KVM switch can remove an entire second set of cables from the equation; the best KVM switches covers that path. Cable management is not a one-time art project — build it so the version of you who adds a device next year can plug in without undoing your work.
Treat the finished bundle as something you will revisit, not seal forever. When you add or retire a device, take the two minutes to route its cable into the tray and label it then, rather than letting one loose cord become five. It also helps to snap a quick photo of the back of the desk once everything is tidy, so if you ever move or reconfigure you have a map of what plugged in where. A cable setup you can maintain in small increments stays clean for years; one you have to tear down to touch slowly returns to chaos.
The order to do it in
Most under-desk jobs go wrong because they are done in the wrong sequence — people buy sleeves first, mount the tray last, and end up unpicking their own work. Do it in this order and nothing has to be undone:
- Unplug and inventory. Pull everything out and count what actually crosses from the desk to the wall. That number decides whether you need a tray, a dock, or both.
- Decide the power feed. One strip, mounted under the desk, with everything on the desk plugged into it. This is the step that removes most of the cables you were about to tidy.
- Mount the tray or raceway. Hardware goes up before any cable is routed, because a tray fitted afterward means re-routing everything you just bundled.
- Route, then bundle. Lay each cable along its path first and only then strap it. Bundling before routing is how cables end up crossing each other inside the tray.
- Label both ends, then test. Raise and lower the desk if it moves, roll the chair through, and pull gently on each run before you call it finished.
The whole job takes an evening on a fixed desk. The parts that make it last are the tray and the mounted power strip — ties and sleeves are finishing, not structure.
If you cannot drill the desk
Renters, leased offices, glass tops and desks still under warranty all rule out wood screws, which is what most under-desk hardware expects. There are four honest alternatives, in descending order of how much load they hold. Clamp-on trays and stripsgrip the desktop edge or the frame and hold real weight without a single hole — the strongest no-drill option and the one to reach for first. Frame-mounted hardware bolts to the metal legs or crossbar rather than the top, which suits most sit-stand desks because the frame is already drilled and threaded. Adhesive clips and channels work for light runs on a smooth, clean, unpainted underside; they fail on textured particle board, on anything dusty, and in warm rooms, so keep them for single cables rather than bundles. Hook-and-loop straps around the frame cost almost nothing and will carry a surprising amount if you spread the load across two or three.
Glass desks are the hardest case: nothing adhesive looks good on glass from below, and everything is visible from above. Clamp hardware at the back edge plus a fabric sleeve for the drop to the floor is usually the only combination that reads as tidy. The no-drill picks in our cable tray roundup call out which trays clamp rather than screw.
What this actually costs
Less than people expect, and the cheap version is most of the benefit. A minimum kit is one mountable power strip, one tray, and a pack of reusable hook-and-loop straps — that is the structure, and it is what turns a floor nest into a managed desk. Everything after that is refinement: a sleeve for the visible drop, a grommet so cables pass through the desktop instead of around it, clips for the single runs, a spine if the desk moves. Spend the money on the tray and the strip, buy the ties in a big pack once, and skip the branded kits that bundle a little of everything at a premium. Current prices for each part are on the under-desk cable management roundup, which ranks the boxes, raceways, sleeves and ties individually rather than as a set.
Essentials
The small parts that finish the job
Nothing here changes a pick above, and none of it is a considered purchase. These are the cheap pieces that decide whether the expensive one works properly, and the ones people discover they are missing on the day the big box arrives.

2-Inch Desk Grommet Kit with Hole Saw (10 pack)
Cables that drop straight through the desktop stay where you put them. Cables routed around the back edge get dragged every time the desk moves or the chair rolls back, which is what undoes a tidy run within a week. The hole saw is in the box, so the cut and the finished edge come from one purchase.
Check first: decide the hole position and check your desktop thickness before you cut. A grommet hole is not reversible.
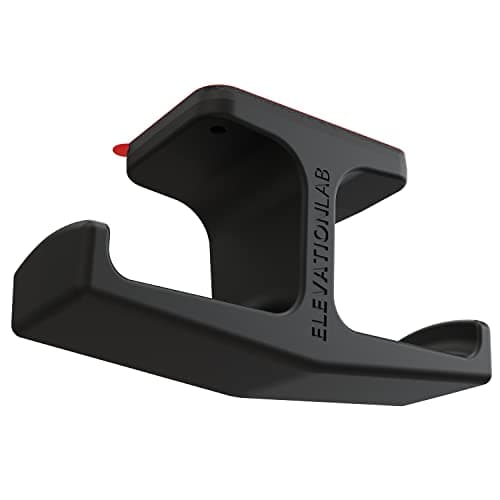
Elevation Lab The Anchor Under-Desk Headphone Mount
A headset left on the desk takes up the same surface an arm or a riser was bought to give back. Under the front edge it hangs in dead space, out of the way of the keyboard and off the cables.
Check first: adhesive mounts want a smooth, clean underside. Rough or heavily textured laminate will not hold one.
#ad · Live prices from the Amazon Product API, as of Sep 24, 2026. Where we have no verified live price we show none. We may earn a commission, at no extra cost to you.
Questions
Frequently asked
What is the best way to hide cables under a desk?
Mount a cable tray under the desk to hold a single surge-protected power strip and the bulk of the slack, route each device’s cable down into it, and use a raceway for any run that has to reach the floor. The goal is one managed path with nothing resting on the carpet.
How do I manage cables on a standing desk?
Plan for the desk’s highest position. Leave a deliberate loop of slack in every cable that runs from the desktop to the wall so nothing pulls tight when the desk rises, route those cables through a flexible spine or chain so they move as one guided bundle, and keep the path clear of the frame so nothing snags.
Should I use zip ties or hook-and-loop straps for cables?
Hook-and-loop (Velcro-style) straps are better for cable management. They cinch just as neatly as zip ties but open in a second, so you can swap or remove one cable without cutting the whole bundle apart, and they will not pinch a cable the way an overtightened zip tie can.
How do I stop cables from falling behind my desk?
Get them off the floor and into a tray mounted under the desk, and consolidate power to one strip on that tray so only a single cord reaches the wall. With the mass of cabling held in the tray and bundled, there is nothing loose to slide down behind the desk in the first place.
Do I really need a cable management tray?
It is the highest-impact single piece for most desks, because it gives the power strip and the slack a home off the floor and out of sight. You can manage without one using raceways and straps alone, but a tray is what makes the difference look finished rather than merely tidy.
How do I manage cables under a desk without drilling?
Use the frame and the edge instead of the underside. Clamp-on trays and clamp-mounted power strips grip the desktop edge and hold real weight with no holes; frame-mounted hardware bolts to the metal legs or crossbar, which suits most sit-stand desks. Below that, adhesive clips handle single light cables on a smooth, clean underside, and hook-and-loop straps wrapped around the frame will carry a bundle if you spread the load across two or three.
Adhesive is the one to be careful with: it lets go on textured particle board, on dusty surfaces and in warm rooms, usually a few weeks after you have declared the job finished. Keep it for the last few cables rather than making it the structure.
What order should I do under-desk cable management in?
Inventory what crosses from desk to wall, mount one power strip under the desk and plug everything on the desk into it, fit the tray or raceway, then route each cable along its path and only bundle it once it is where it belongs. Label both ends as you go, then test: raise and lower the desk if it moves, roll the chair through, and give each run a gentle pull. Doing hardware before cables is the part that saves you from redoing it.
How much does under-desk cable management cost?
The structural parts are a mountable power strip, one tray, and a pack of reusable hook-and-loop straps — that combination does most of the work on most desks. Sleeves, clips, a desk grommet and a cable spine are refinements you can add later or skip. Buying individual parts beats buying a branded all-in-one kit, because the kits bundle a little of everything and you rarely need a little of everything.
Keep reading
Related
- The Best USB HubsAnother box that belongs under the desk, not on it.
- Cable Management for a Standing DeskA desk that moves turns every cable into a moving cable.
- The best under-desk cable traysThe trays that make this method work.
- The best desk power stripsThe strip that goes in the tray.
- The best under-desk cable managementThe trays, raceways, and straps that make up the backbone.
- The best USB-C docks for dual monitorsRemove several cables before you manage any.
- The best standing desksWhich frames handle moving cables for you.
- Dual monitor not detected?When a cable swap is the fix, and when it is the port.
- The best desk setup gifts under $50Six daily-use desk gifts with no sizing risk.
Receipts
Sources
- OSHA — Computer Workstations eTool
- Electrical Safety Foundation International (ESFI)
- Cable management (overview)
We do not run a testing lab, and we do not pretend to. Specifications come from the manufacturer or retailer listing; the footprint and clearance math is ours and reproducible. Where we could not verify a number, we say so on the page rather than quietly leaving it out. Read our full method.